“Life is not perfect, but your nails can be.”- And when your nails are perfect then everything seems perfect! On that happy note this is a shout out ...
5 min read
Share


“Life is not perfect, but your nails can be.”- And when your nails are perfect then everything seems perfect! On that happy note this is a shout out to all the ladies out there who are worried about how to do their nails perfectly. We have heard you! And here we are bringing to you some easy manicure tips and best of hacks, bet you are going to love it.
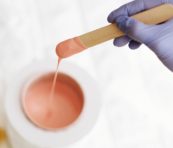
The best manicure can be achieved when you have all the essentials tools by your side, so remember to keep all the manicure essentials like, nail polish remover, nail clippers, cuticle pusher, cuticle remover, base coat, hand moisturizer and of course nail polish handy. Now, it is important for you to clean your nails before your manicure, start by removing previously applied nail polishes with your nail polish remover after that follow any one of the methods of nail cleaning according to your suitability-

Just after you finish cleaning your nails, select the type of nail shape you want to sport! It can be-

Accordingly clip the nails into the desired shape! After you clip your nails with help of the cuticle pusher push the cuticles gently backward. Remember- not to push your cuticles hard because that might damage your skin and at the same stunt nail growth! For the free edges nip the cuticles with cuticles nipper very gently.
Once you are done with the trimming part, go for a good moisturizing and pamper your nails and cuticles with a very rich moisturizer (and if you have an oily skin opt for a gentle moisturizer) this will keep your skin hydrated and healthy. End the moisturizing part with two coats of transparent nail polish or commonly known as base coats this will help to keep your manicure to stay longer, protect your nails and keep them healthy!

Pro tip– In case you do not have a good moisturizer go ahead with your oil, that too is quite beneficial (but remember this tip is not for oily skin)
We all can agree that this is the most adventurous and exciting part! Often you are successful but every now and then, you fail and it gets on your nerves! – We are here to help you with some very easy and executable tips!
 [Also Read: 10 Prettiest Nail Polish Colors To Rock This Winter]
After you painting your nails you need to dry them but remember to not use a hairdryer for drying the paint. Keep them under fan but not too near to the fan for that may create bubbles.
Pro tip– a) Once nail painting is done, place your hand under running water this will help your paint to settle on your nails and will last longer!
b) If you are in hurry, dip your just painted nails in ice cold water, it’ll dry up in a jiffy.
Once you are done with painting and drying your nails, reapply the moisturizer on your hands and nails for this will help to retain the moisture and keep your hands supple and soft.
So ladies now you are good to go with these simple yet helpful tips! It is essential to take care of your hands, keeping them clean and manicured hands helps to showcase your personality and creates good impression. Hope the next time you sit for a manicure, you will find it easier and have a lot of new trendy options to decorate your beautiful hands and to pamper yourself with!

Subscribe to our newsletter